In case you missed it see what’s in this section
We recommend
Without a doubt the most recognisable symbol of Halloween is the jack-o-lantern. After all, what would October 31st be without a carved pumpkin sitting on your doorstep?
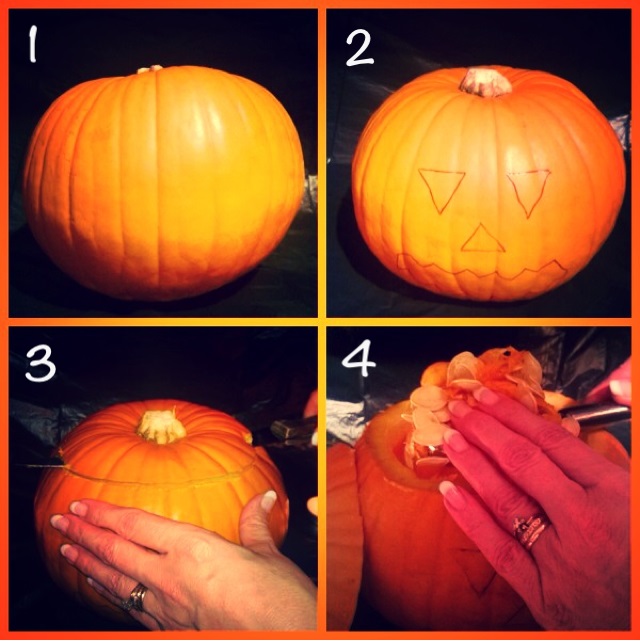
Become the envy of all of your neighbours and follow our easy step-by-step guide to achieve the best jack-o-lantern in town:
1. Firstly choose your pumpkin. The larger it is, the easier it will be to carve. Avoid pumpkins with bruises or mouldy stems as they tend to spoil quickest.
2. Draw your design on the pumpkin with a water-based marker beforehand. Mistakes are easily erased with a damp cloth.
3. Next use a sharp serrated knife to cut off the crown. When carving, keep a portion of the knife blade in the pumpkin and use slow, steady saw strokes.
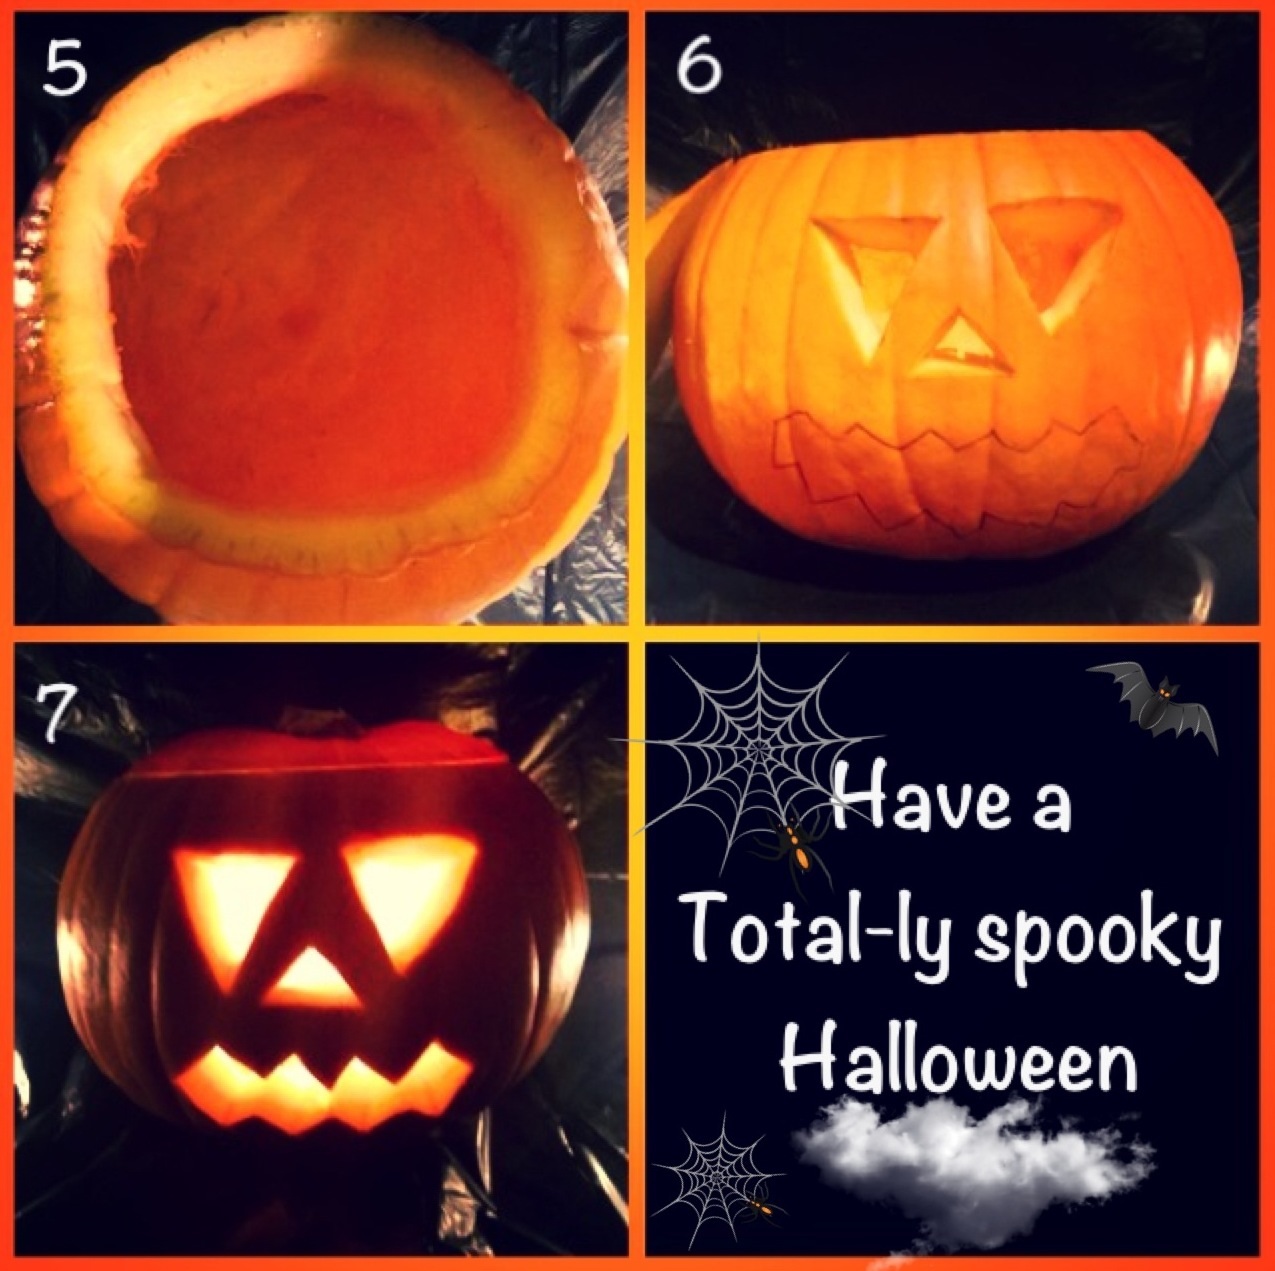
4. Using an ice cream scooper or large serving spoon, scoop out the pumpkin's innards. Remove all seeds, fibres and flesh.

5. Without digging too deep, flatten a spot in the base of the pumpkin for the candle.
6. Using a small serrated knife cut out the eyes, nose and mouth. Ensure that you carve the facial features closest to the centre first and work outward.
7. Place a tea light inside the pumpkin, light and replace the crown.

In case you missed it see what’s in this section
Listings